
首先在你的数据库下运行一个sql文件,其内容如下,该内容是新建一张表,表名为usr,当然你也可以自己创建,但是我觉得自动比手动更方便
/*
 Navicat Premium Data Transfer

 Source Server         : localhost_3306
 Source Server Type    : MySQL
 Source Server Version : 80016
 Source Host           : localhost:3306
 Source Schema         : ceshi

 Target Server Type    : MySQL
 Target Server Version : 80016
 File Encoding         : 65001

 Date: 31/12/2024 22:07:00
*/

SET NAMES utf8mb4;
SET FOREIGN_KEY_CHECKS = 0;

-- ----------------------------
-- Table structure for usr
-- ----------------------------
DROP TABLE IF EXISTS `usr`;
CREATE TABLE `usr`  (
  `uid` int(11) NOT NULL,
  `username` varchar(255) CHARACTER SET utf8mb4 COLLATE utf8mb4_0900_ai_ci NULL DEFAULT NULL,
  `password` varchar(255) CHARACTER SET utf8mb4 COLLATE utf8mb4_0900_ai_ci NULL DEFAULT NULL,
  PRIMARY KEY (`uid`) USING BTREE
) ENGINE = InnoDB CHARACTER SET = utf8mb4 COLLATE = utf8mb4_0900_ai_ci ROW_FORMAT = DYNAMIC;

-- ----------------------------
-- Records of usr
-- ----------------------------
INSERT INTO `usr` VALUES (1, '123', '123');
INSERT INTO `usr` VALUES (2, '111', '21123123');

SET FOREIGN_KEY_CHECKS = 1;
然后新建一个项目
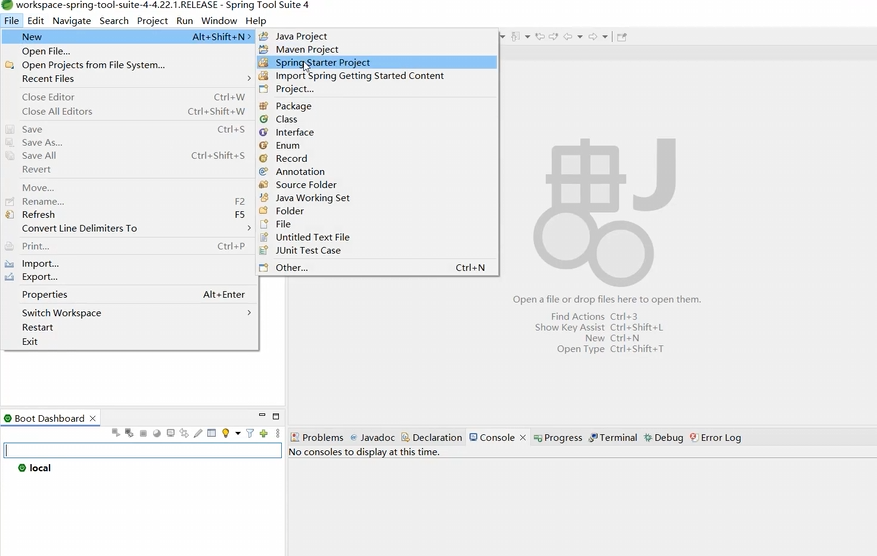
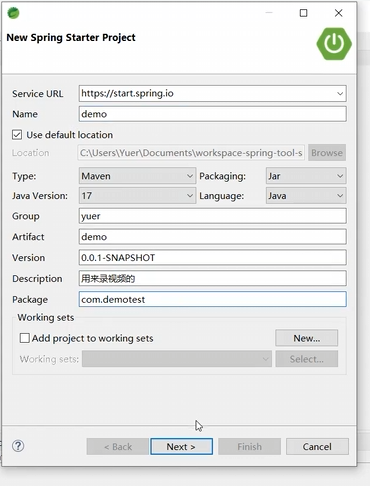
然后项目基本信息如下
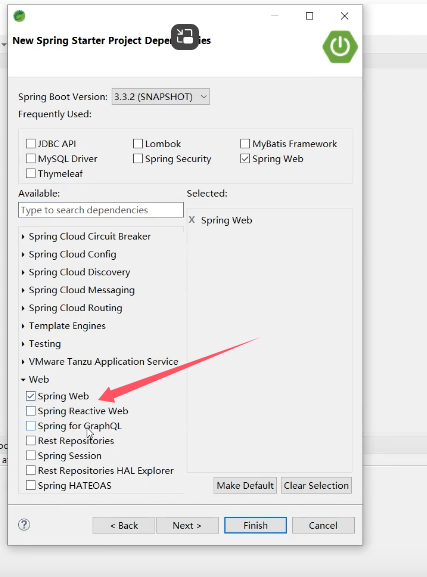
然后勾选web下面的Spring Web
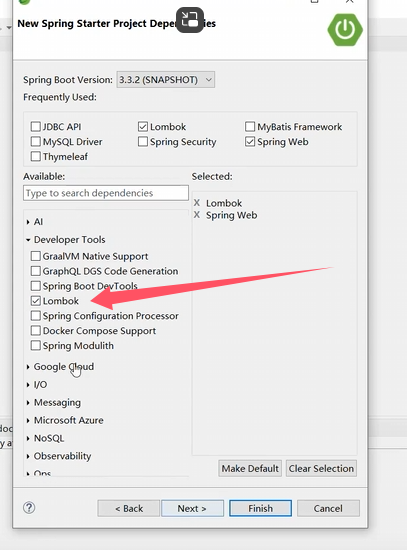
再勾选Developer Tools下面的Lombok
然后一路next即可
新建完成后找到pom.xml将3.3.2-SNAPSHOT改成2.7.6
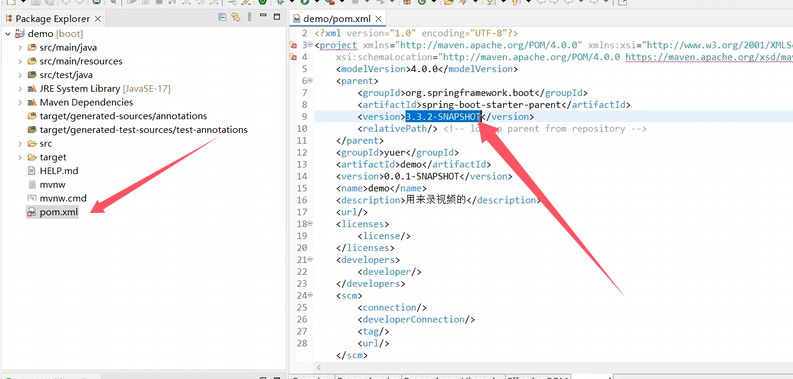
改为
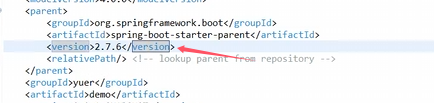
然后在pom.xml里面添加依赖
		<!--mysql连接驱动-->
		<dependency>
		    <groupId>mysql</groupId>
		    <artifactId>mysql-connector-java</artifactId>
		    <scope>runtime</scope>
		</dependency>
		<!--mybatis-plus系列-->
		<dependency>
		    <groupId>com.baomidou</groupId>
		    <artifactId>mybatis-plus-boot-starter</artifactId>
		    <version>3.5.7</version>
		</dependency>
                //mybatis-plus-boot-starter-test可注释测试才用的
//		<dependency>
//		    <groupId>com.baomidou</groupId>
//		    <artifactId>mybatis-plus-boot-starter-test</artifactId>
//		    <version>3.5.7</version>
//		</dependency>
		<dependency>
		    <groupId>com.baomidou</groupId>
		    <artifactId>mybatis-plus-generator</artifactId>
		    <version>3.5.7</version>
		</dependency>
		<!--swagger数据测试-->
		<dependency>
		    <groupId>io.springfox</groupId>
		    <artifactId>springfox-boot-starter</artifactId>
		    <version>3.0.0</version>
		</dependency>
然后找到application.properties文件修改内容
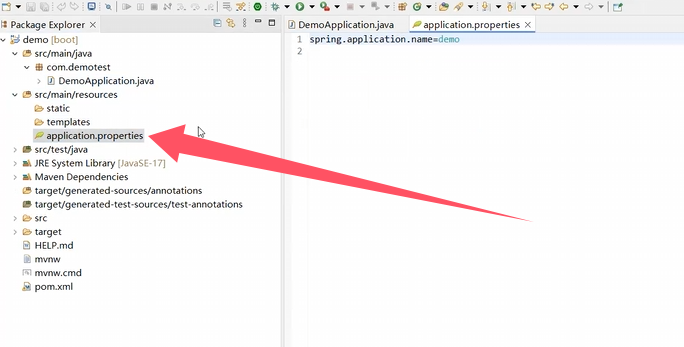
修改为
spring.application.name=demo

spring.mvc.pathmatch.matching-strategy: ant-path-matcher

spring.datasource.url: jdbc:mysql://localhost:3306/demoyuer
spring.datasource.username: root
spring.datasource.password: root
spring.datasource.driver-class-name: com.mysql.cj.jdbc.Driver

mybatis.mapper-locations=classpath*:mapper/*.xml
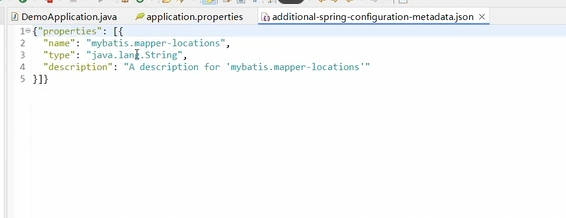
如果最后一行出现黄色波浪线,鼠标移过去点击那个Creat metadata for ‘mybatis。mapper-locations’
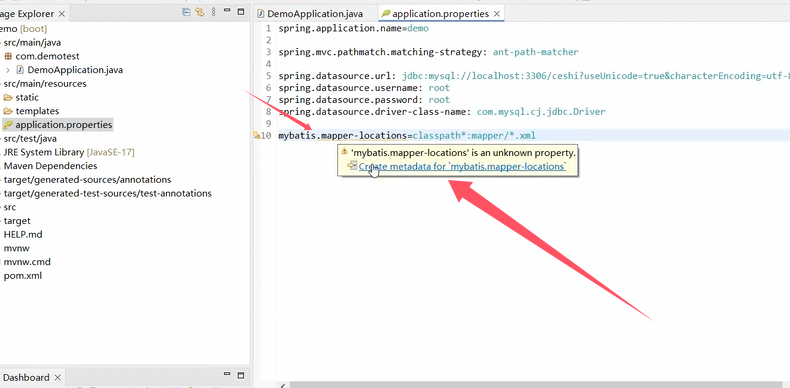
然后会生成一个新的文件,直接Ctrl+s保存关闭就好
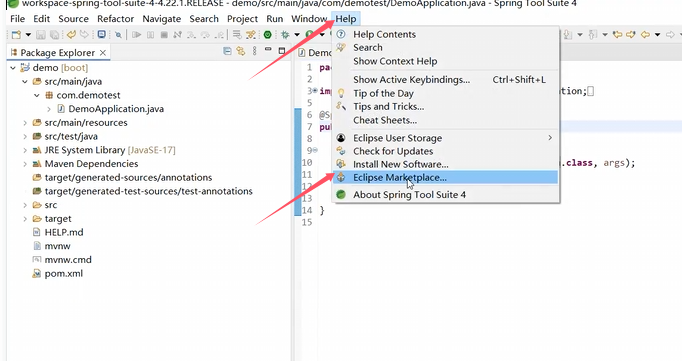
然后安装Mybatis Generator 插件 点击help->Eclipse Marketplace
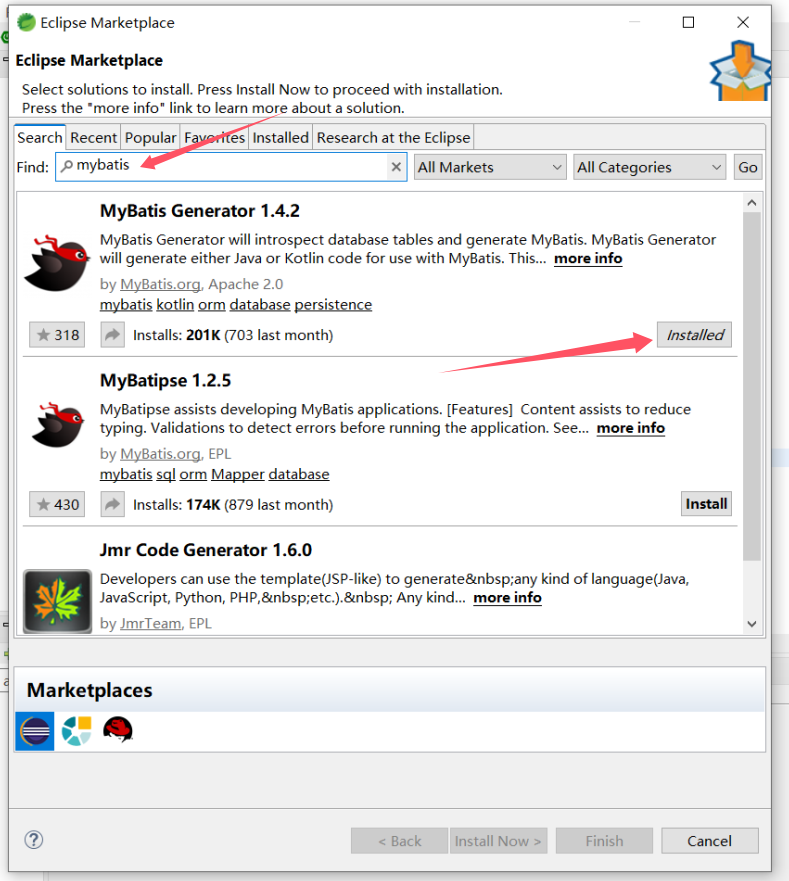
输入mybatis,选择Mybatis Genertator安装即可
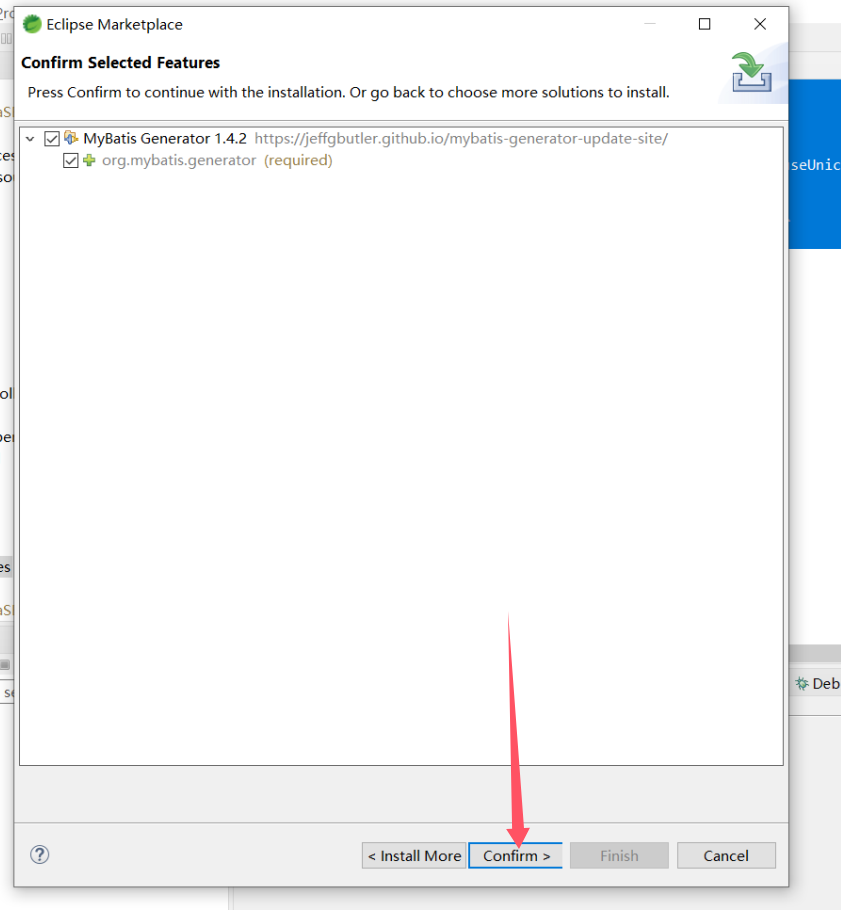
然后一路确认就好
然后在该目录新建一个Mybatis Genertator配置文件
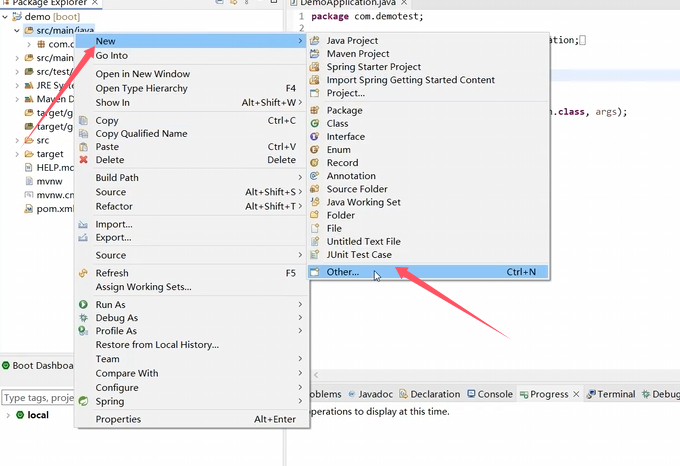
然后点击next
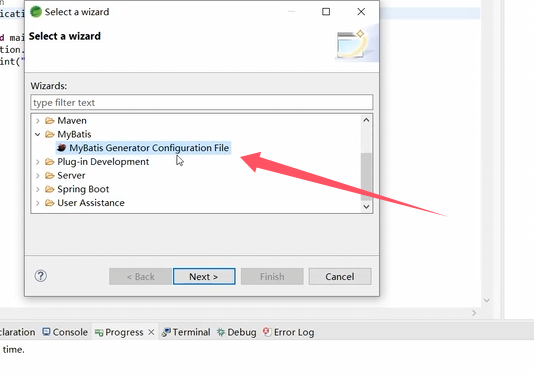
然后就用默认的名字就好
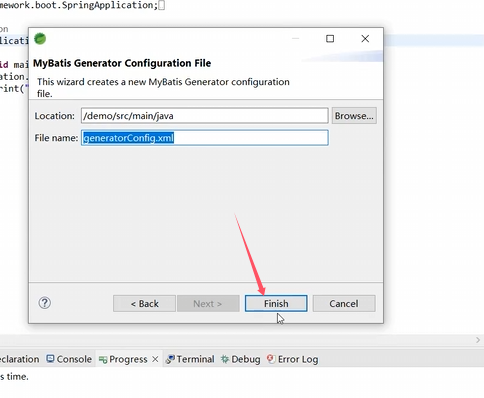
然后复制该内容到该文件
<?xml version="1.0" encoding="UTF-8"?>
<!DOCTYPE generatorConfiguration PUBLIC "-//mybatis.org//DTD MyBatis Generator Configuration 1.0//EN" "http://mybatis.org/dtd/mybatis-generator-config_1_0.dtd">
<generatorConfiguration>
    <!-- 数据库驱动-->
    <context id="MySQL" targetRuntime="MyBatis3">
        <commentGenerator>
            <property name="suppressDate" value="true"/>
            <!-- 是否去除自动生成的注释 true:是 : false:否 -->
            <property name="suppressAllComments" value="true"/>
        </commentGenerator>
    <!--数据库链接URL,用户名、密码 -->
    <jdbcConnection driverClass="com.mysql.cj.jdbc.Driver" connectionURL="jdbc:mysql://localhost:3306/ceshi" userId="root" password="root"/>
    <!--是否启用java.math.BigDecimal-->
        <javaTypeResolver>
            <property name="forceBigDecimals" value="false"/>
        </javaTypeResolver>
    <!-- 实体类的位置-->
    <javaModelGenerator targetPackage="com.demotest.dao" targetProject="demo/src/main/java">
            <property name="enableSubPackages" value="true" />
            <property name="trimStrings" value="true" />
    </javaModelGenerator>
    <!-- Mapper.java的位置-->
    <sqlMapGenerator targetPackage="com.demotest.Mapper" targetProject="demo/src/main/java">
            <property name="enableSubPackages" value="true" />
    </sqlMapGenerator>
    <!-- Mapper.xml的位置-->
    <javaClientGenerator targetPackage="com.demotest.Mapper" targetProject="demo/src/main/java" type="XMLMAPPER">
        <property name="enableSubPackages" value="true" />
    </javaClientGenerator>
    <!-- 要生成的表 tableName是数据库中的表名或视图名 domainObjectName是实体类名-->
    <table tableName="usr" domainObjectName="user" enableCountByExample="false" enableUpdateByExample="false" enableDeleteByExample="false" enableSelectByExample="false" selectByExampleQueryId="false">
        <property name="useActualColumnNames" value="true"/>
    </table>
  </context>
</generatorConfiguration>
然后按照箭头指示和文字解释修改成你的数据库内容
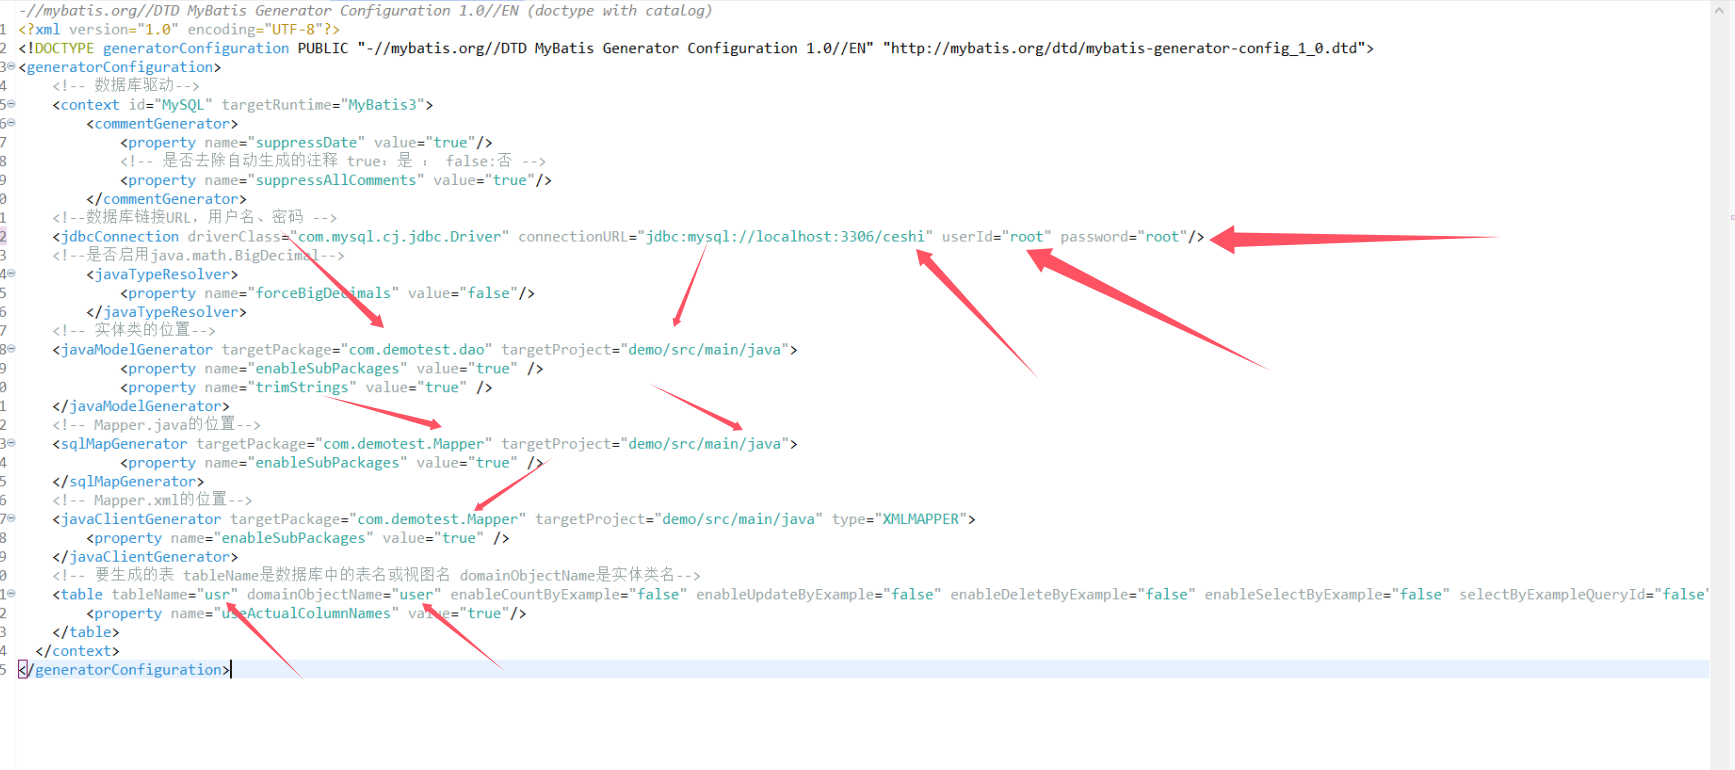
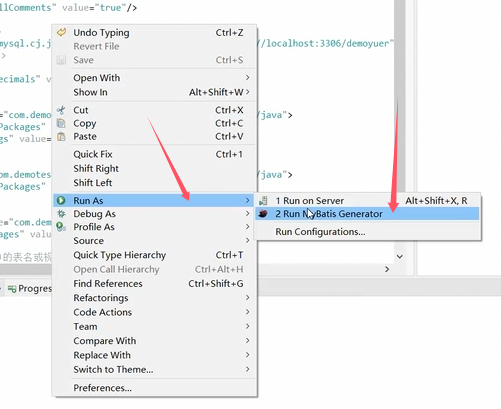
然后在空白处右键->Run As->Run MyBatis Generator
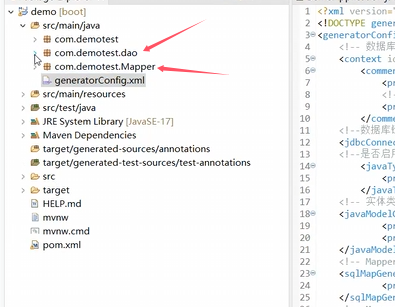
然后你会发现该目录多出了两个包
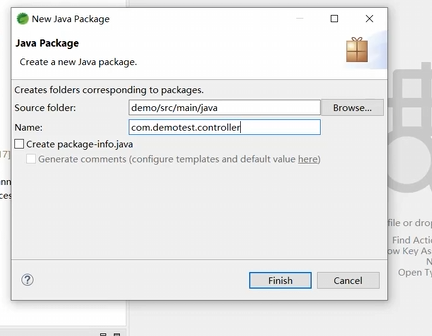
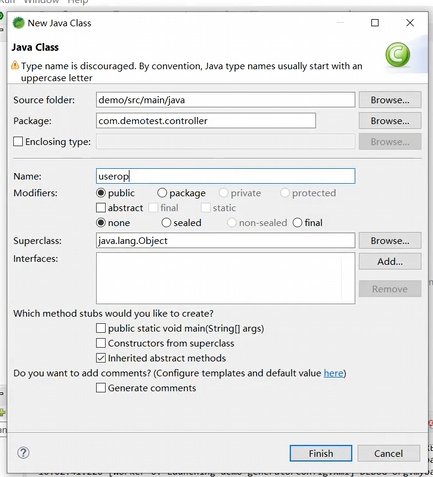
我们再在该目录下新建一个controller包
再在该包下新建一个类
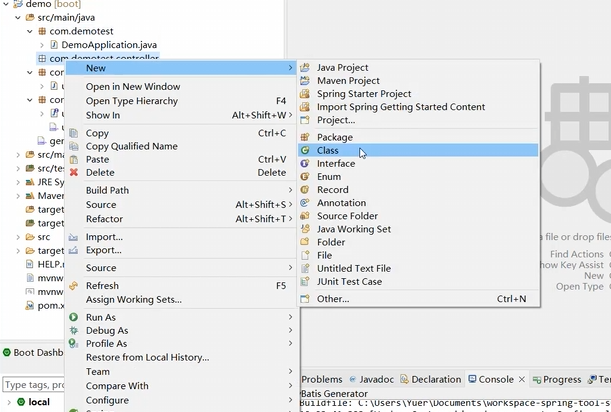
名字叫userop就好
然后在主程序入口处添加上红色方框的两行注解
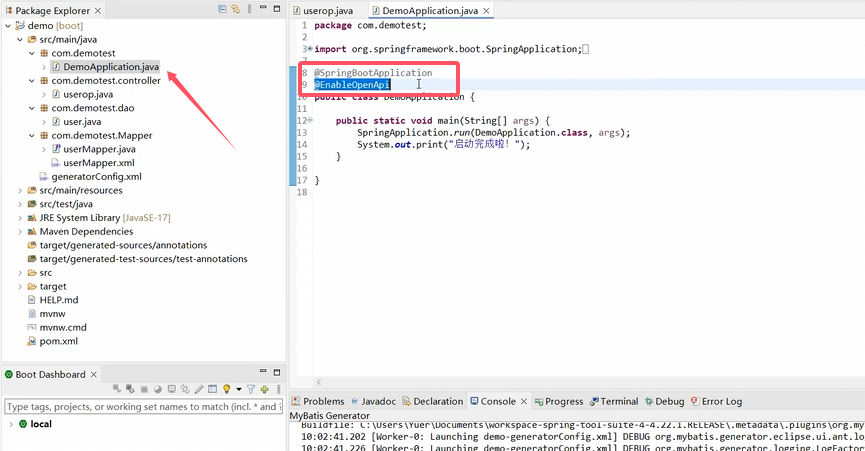
注解内容如下
@SpringBootApplication
@EnableOpenApi
然后浏览器打开如下网址
http://localhost:8080/swagger-ui/index.html
如果出现图片内容即为正常启动
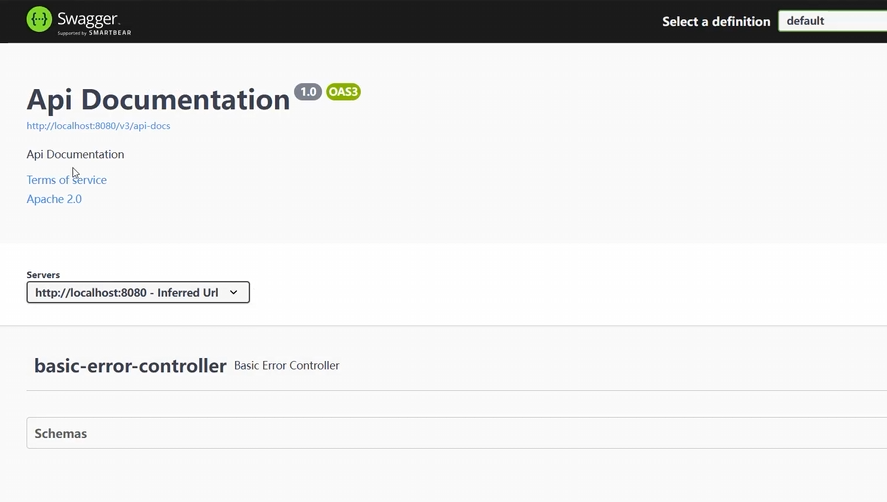
出现了该界面之后,在上一步加注解的地方再加入Mapper的位置,方便程序运行,所以一共会有三个注解
@SpringBootApplication
@EnableOpenApi
@MapperScan("com.demotest.Mapper")
切记MapperScan一定要对应Mapper的位置,一定不能乱写
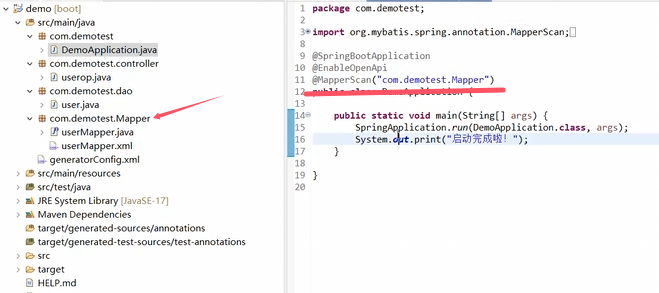
然后修改userop.java为如下内容
package com.demotest.controller;

import java.util.List;
import org.springframework.beans.factory.annotation.Autowired;
import org.springframework.web.bind.annotation.GetMapping;
import org.springframework.web.bind.annotation.PathVariable;
import org.springframework.web.bind.annotation.PostMapping;
import org.springframework.web.bind.annotation.RequestBody;
import org.springframework.web.bind.annotation.RestController;
import com.demotest.Mapper.userMapper;
import com.demotest.dao.user;

@RestController
public class userop {
    private final userMapper usr;

    @Autowired
    public userop(userMapper usr) {
        this.usr = usr;
    }

    //查找记录根据uid
    @GetMapping("/getone/{uid}")
    public user selectByPrimaryKey(@PathVariable  Integer uid)
    {
    	return usr.selectByPrimaryKey(uid);
    }

    //增加一个记录
    @PostMapping("/add")
    public int insert(@RequestBody  user row)
    {
    	return usr.insert(row);
    }

    //删除一个记录
    @GetMapping("/delete/{uid}")
    public int deleteByPrimaryKey(@PathVariable  Integer uid)
    {
    	return usr.deleteByPrimaryKey(uid);
    }

    //修改一个记录
    @PostMapping("/change")
    public int updateByPrimaryKey(@RequestBody  user row)
    {
    	return usr.updateByPrimaryKey(row);
    }

    //返回全部记录
    @GetMapping("/all")
    public List<user> selectAll(){
        return usr.selectAll();
    }
}
然后打开com.demotest.Mapper目录下userMapper.java并添加如下
List<user> selectAll();
如图:

然后打开com.demotest.Mapper目录下userMapper.xml并添加如下
<select id="selectAll" resultMap="BaseResultMap">
select
<include refid="Base_Column_List" />
from usr
</select>
如图:

然后打开浏览器输入该网址
http://localhost:8080/swagger-ui/index.html
界面就会多出我们自己编辑的类userop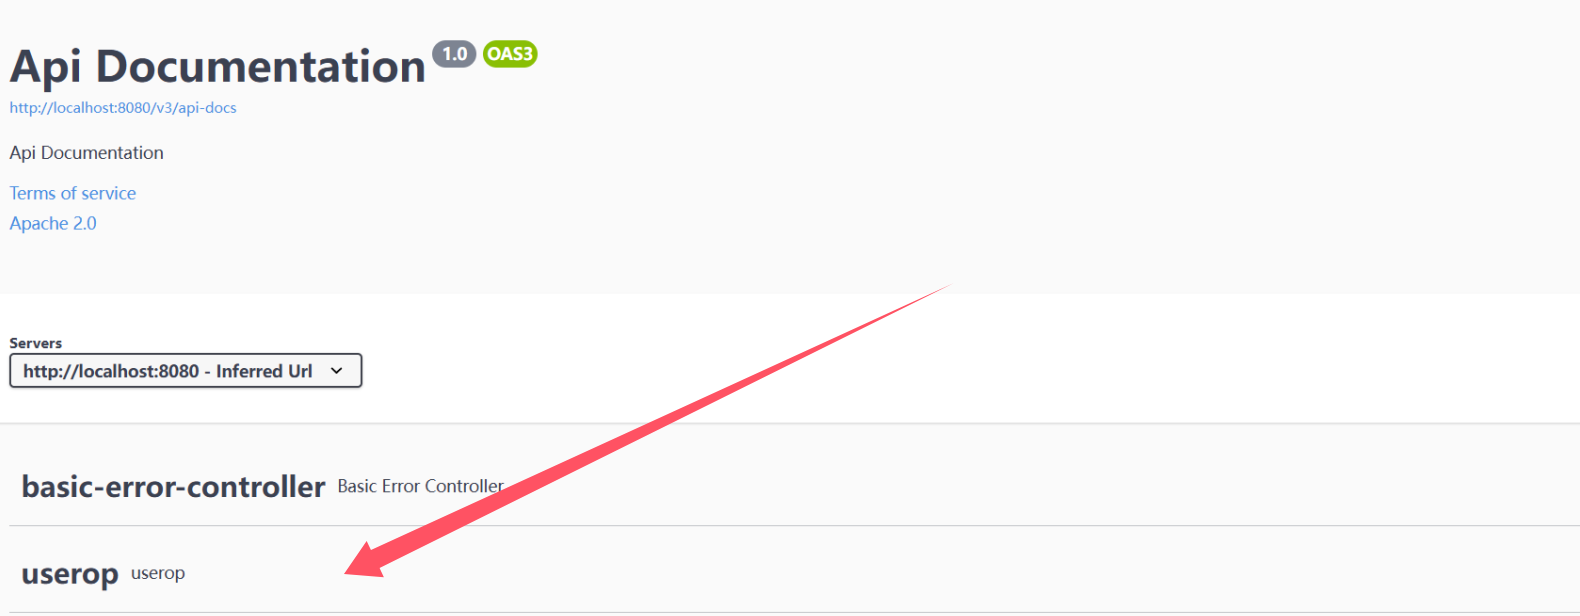
然后我们点开他选择add insert
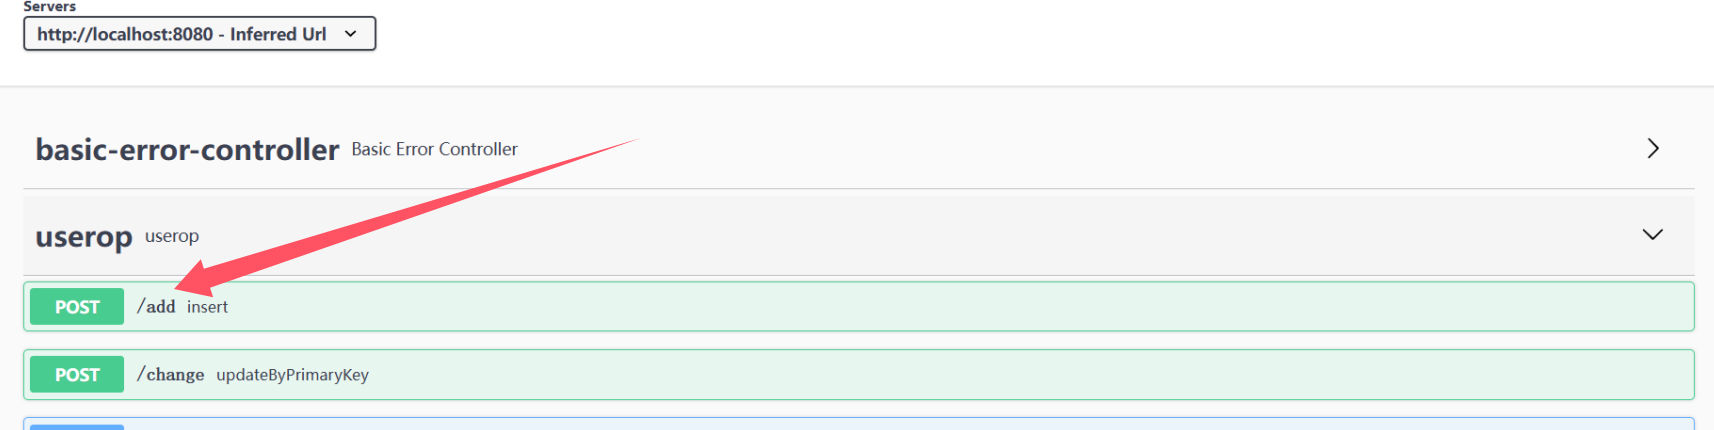
然后点击Try it out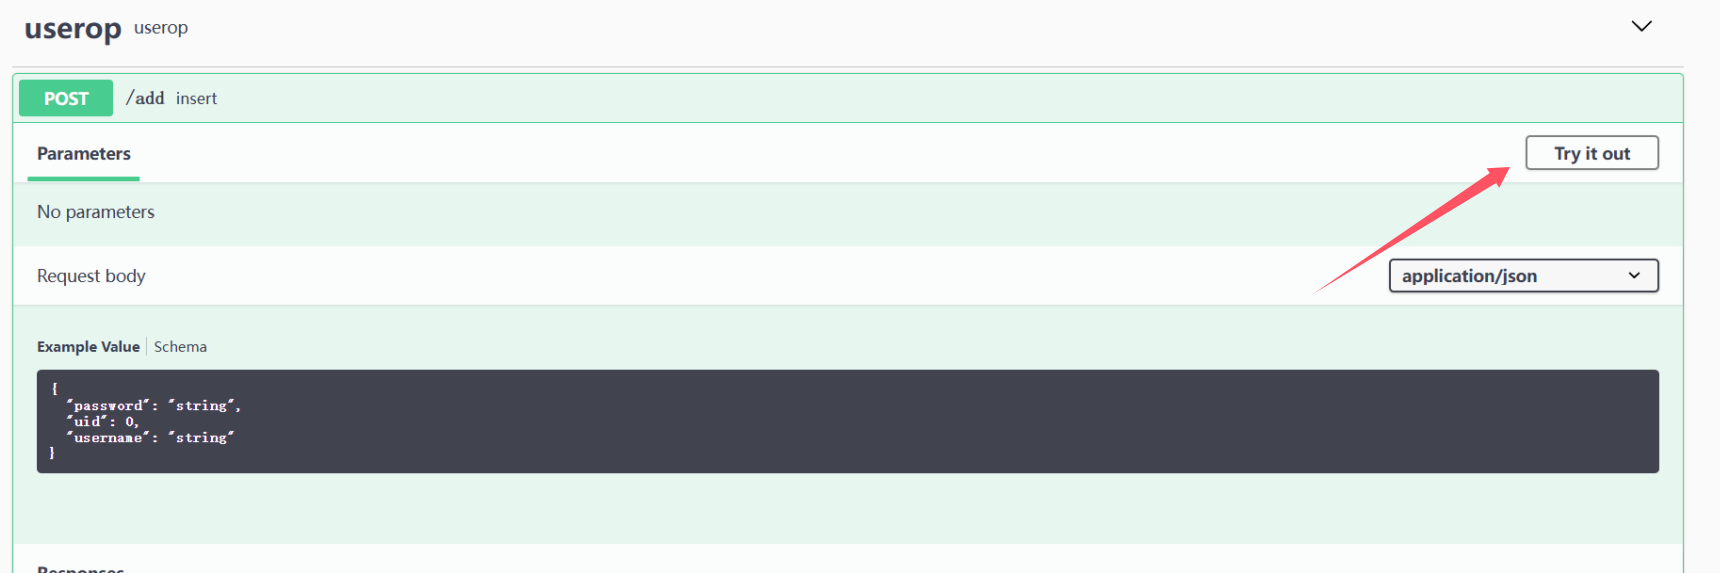
然后自己手动编辑一下表单内容,点击Execute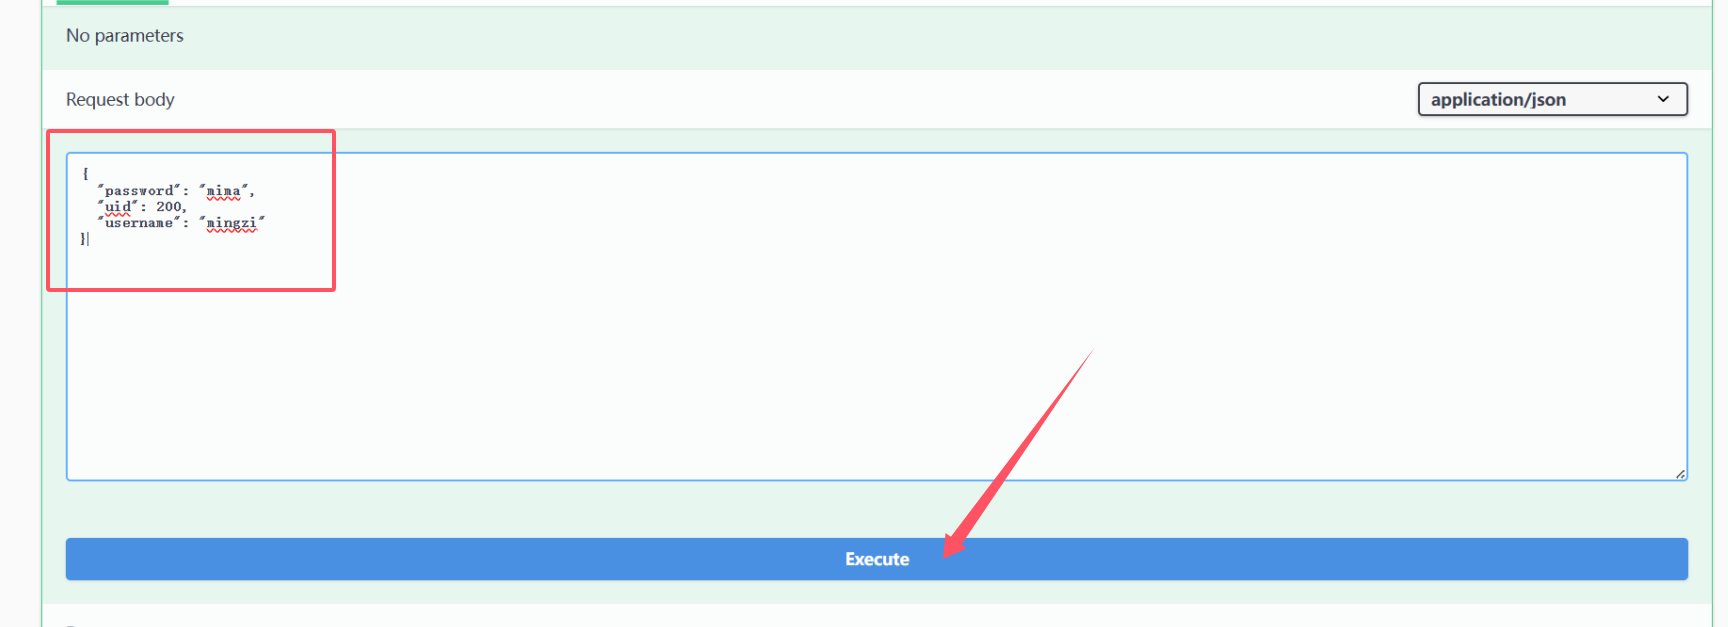
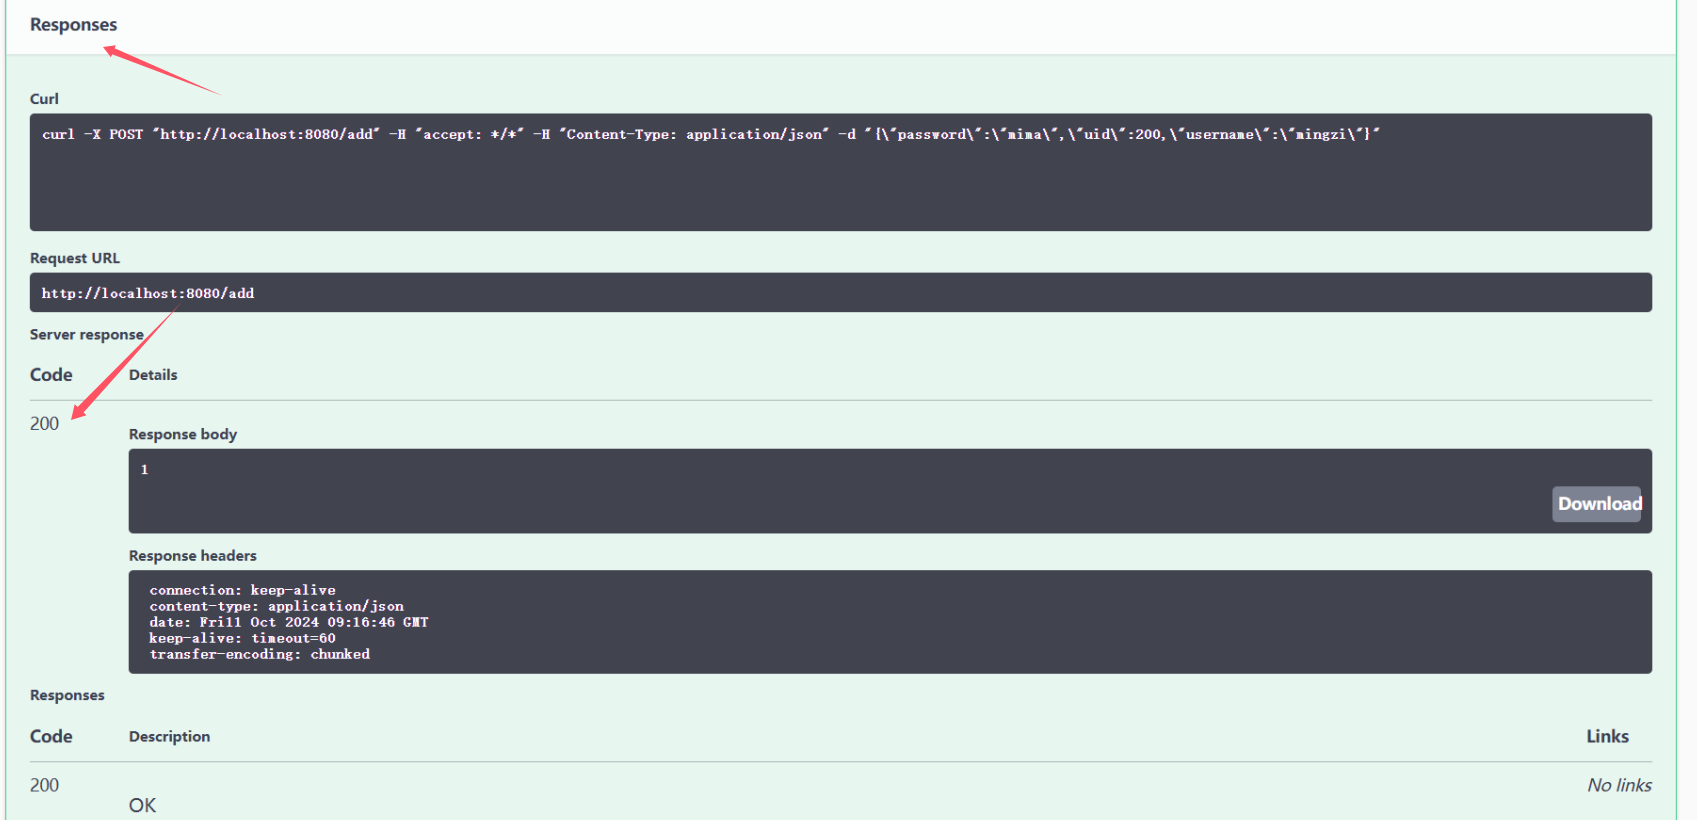
然后可以看到Responses里面的Code是200,编码为200就是成功了
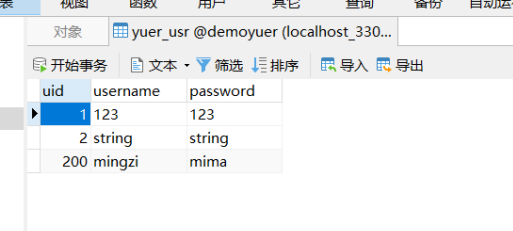
再返回数据库看到新的数据
其他功能我就不展示了,大同小异,大家加油!